Wednesday, October 21, 2015

DIY Meson Jar Cocktail Gifts


DIY // Cocktail Mason Jar Gift


Christmas is just around the corner and these mason jar cocktails make adorable gifts! This project is so simple and very creative! This makes a perfect DIY gift for any occasion and it can also make great party favors as well. Each jar can be personalized for each individual, or you can create all the jars the same. Lets get started!

Items Needed
  • 16oz Mason Jar Mugs (mouth must be at least 2.5″ wide)
  • 7.5oz Mini-skinny bottles of soda
  • Mini bottles of alcohol
  • Cute straws
  • Twine and tags
  • Scissors
 For this project, you MUST find cans that are small enough to fit down into your mason jar. For this tutorial, we are using 16 ounce mugs that have a 2.5″ wide mouth. DIY // Cocktail Mason Jar Gift
Step 1
First, tie a double knot around the jar by using two pieces of twine. You want to make it extra sturdy to be sure the first knot is tightly secured onto the mason jar.
DIY // Cocktail Mason Jar Gift
Step 2
Make your second knot is loose enough to where you can fit a straw down into it. After the straw is in the loop of the knot, tighten it just enough to wear the straw won't fall out on its own.
DIY // Cocktail Mason Jar Gift

Step 3
Repeat step two, and insert your mini liquor bottle into the middle of the knot. Be sure its tight enough to where the bottle won't fall out.
 DIY // Cocktail Mason Jar Gift
Step 4
In this step we'll be adding the tag. Tie a bow with two pieces of twine and cut any leftover twine off to give it a neater look. You can write whatever you want on your tag. If your making these as specialized gifts for each person, you could put there names on the tag as well.
DIY // Cocktail Mason Jar Gift

And Voila!
This makes for a cute and easy gift to hand out at parties, events, or even give as a secret Santa gift! Its a fun and easy DIY project that everyone will enjoy! Its great for people that are tight on money or just want to give small gifts to neighbors and friends

DIY Lava Lamp


Want a fun and easy project to do with the kids? Or maybe just a a fun DIY project to do on your own?  This lava lamp is easy to do and makes for a fun activity that everyone of all ages can enjoy! They add a pop of color to any dull space and can make a great centerpiece for parties and events! Let get started!

Supplies
-Vase or water bowl- this tutorial uses a tall and skinny vase
-Food Coloring
-Vegatable Oil
-Water
-Alkesetzer

Step 1
First feel up a cup of water and add your favorite food coloring to it- This tutorial uses hot pink!
If you plan on keeping this lava lamp in your room, use the colors that correspond with the colors of your bedspread, walls, ect.

 
Step 2
Next, fill your vase/ water bottle up with vegtable oil about 3/4th of the way.

 
Step 2
After adding the vegetable oil, pour in the food colored water. Fill it up all the way, leaving about an inch of space at the top for the alkaseltzer. By doing this, the oil and water wont overflow.


Step 3
Break up an alkaseltzer tablet into small pieces and drop them in one piece at a time.  This will cause the oil and water to bubble up, giving it a lava lamp affect.


And Voila!
This tutorial is super easy and fun! To add a rainbow affect, add a variety of colors. The colors will mix and flow together as the alkaseltzer dissolves. Also, you can hold a flash light under the lava lamp, flick off the lights, and watch the colors as the glow in the dark! Once the alkaseltzer completely dissolves, just add another crushed tablet to start back up the bubbles!

Thursday, October 1, 2015

Painted Vases

How to paint vases


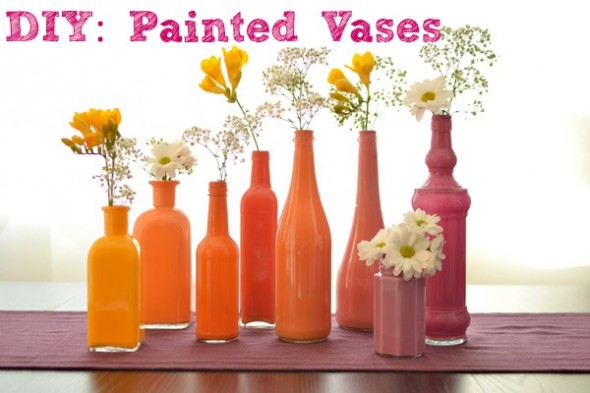
Painted vases are in right now and they can add a little color and flare to your home, and look great for the spring and summer months! They make great centerpieces and are way cheaper to do at home. This project serves as a great way to up cycle any old glass bottles, wine glasses, or vases you have laying around.

Materials Needed:
Glass bottles and/or vases
Paint
Plastic syringe
Vase Liner
Flowers

Step 1
Gather your vases and/or glass bottles that you want to use, any shape or size will work! Next, decide on what colors you want to use.
Step one painted vase DIY
Step 2
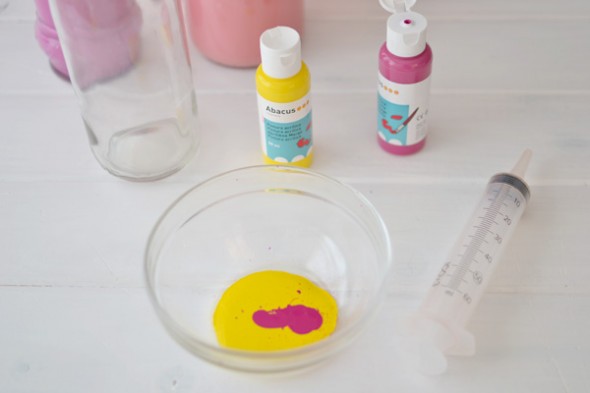
If you have a particular color in mind that you would like to use, mix two colors together to achieve that tone. Has seen above, you can mix pink and yellow to give off an orange or "sunset" color to your vases.
 Step 2 painted DIY vases
Step 3
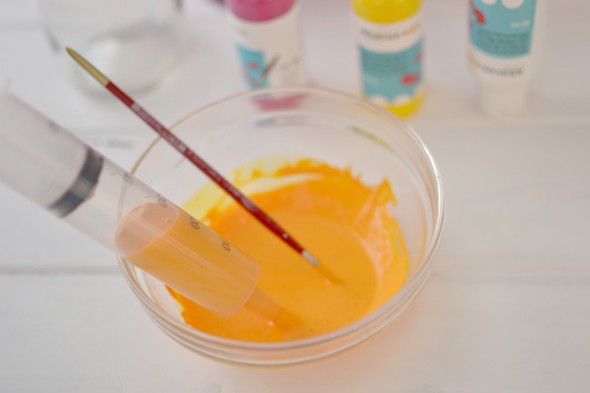
After mixing your paint, use the syringe to pour all of it in your vase. Larger bottles will need between 80 and 100 ml. of paint to fully cover it. 
http://rusticweddingchic.com/wp-content/uploads/2013/05/step-3.jpg 
Step 4
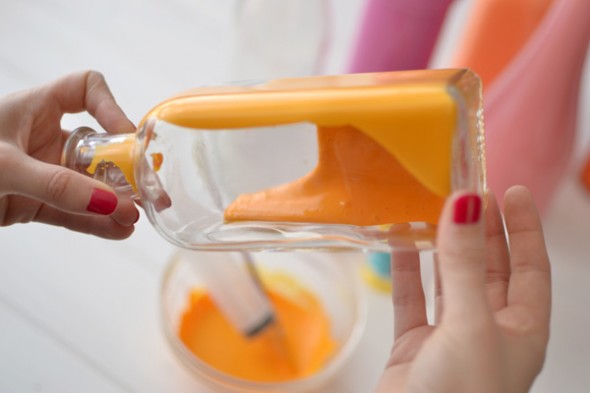
Rotate the bottles in different angles, making sure that the paint covers every inch of it.
 Step 4 DIY Project Painted Vases
Step 5
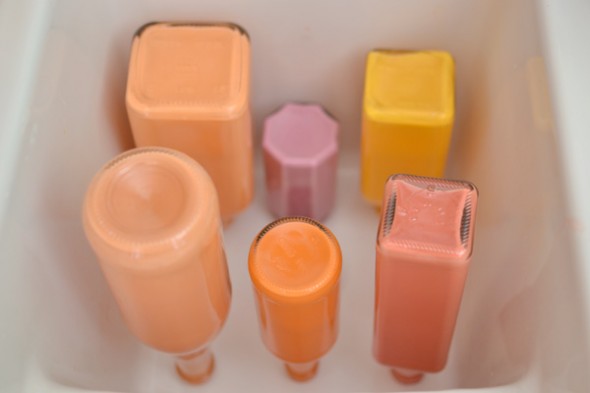
After the paint has evenly covered the inside of the bottles, allow them to dry upside down. Doing this will drain out any left over paint. This step should be done in a sink, on newspapers or absorbent paper. 
Step 5 painted vases diy
Step 6
Allow a day or two for the paint to dry completely, clean off any left over paint off the tip of the glass.
How to make a painted vase 
 And Voila!
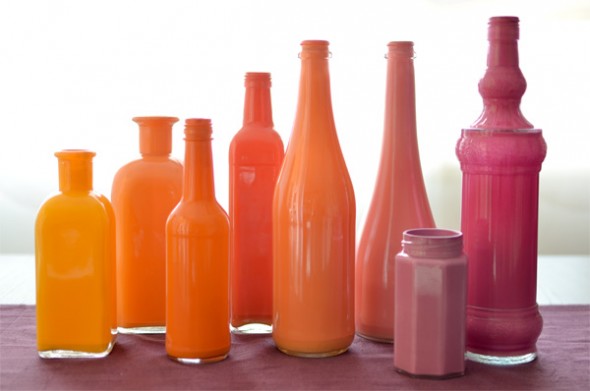
These vases can add color and charm to any space! They look great alone or with flowers! They make great decorations in the home, at special events, or even at country weddings!  

Maon Jar Lid Pumpkins


With it being October, I thought this would be a fun tutorial to do to add a little festivity to your house hold! Pumpkins make cute decorations for the fall season and these mason jar pumpkins are sure to add charm to any space! Its a super simple DIY project that only takes a few items!

Items Needed:
20 Mason Jar Bands
1 can orange spray paint
orange yarn
4-inch Cinnamon Sticks
 
Step 1
Remove the mason jar bands and lay them down several inches apart on newspapers. Doing this outside will offer the best ventilation and prevent paint from getting on your other household items. Next, take the orange spray paint and paint the bands, allowing one side to dry fully before flipping it over and painting the other side. The lids will take about an hour on each side to dry completely.
 
 
  Step 2
After the lids have completely dried, gather them up and be sure all the bands are facing the same direction. Next, take your orange yarn and put it through each and every band. You want to create a circle with the lids once you have finished. Tie a small and tight knot at the ends of the yarn in order to secure the lids in place.


 Step 3
After tying the knot, strategically even out the lids, making sure that they are all evenly placed with no gaps. Last but not least, pop a few cinnamon sticks right in the middle of the lids. This gives the apperence of a pumpkin stem and will add a little extra aroma to your home.
 
And Voila! 
This tutorial is so simple and easy! Its great to do with children and there's a variety of different colored paint you can corporate in the project.
Happy Fall Ya'll!